With Better Badge, you can easily create fully customizable product badges by adjusting text, colors, shapes, and sizes. Custom badges help highlight products with unique styles and can be placed in different positions on product images.
Creating a custom badge by using Better Badge #
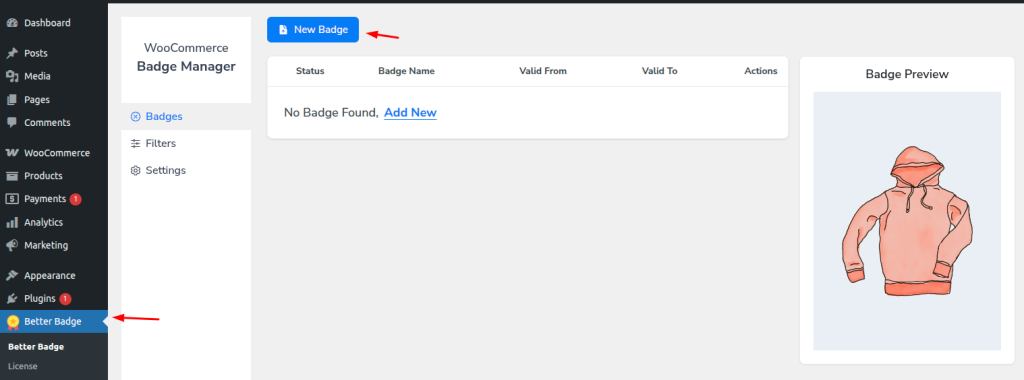
To start, go to your WordPress Dashboard, navigate to Better Badge, and click on “New Badge Button”
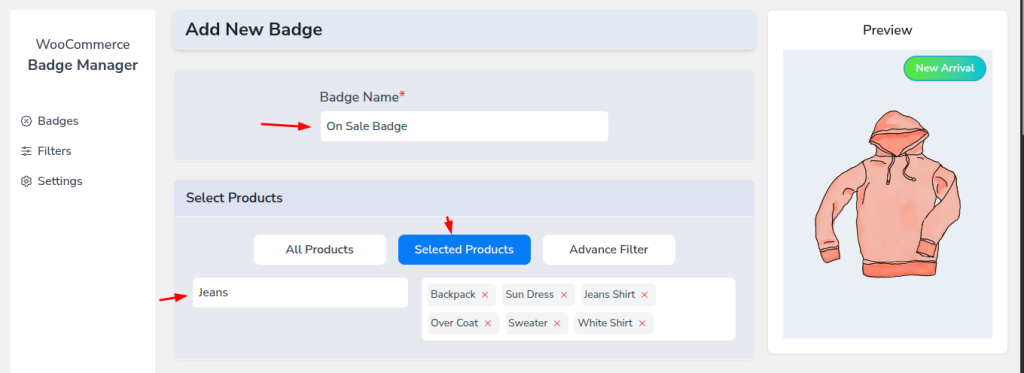
Now you will see the create new badge interface. There, give your badge name and select All Products or Few Products. If you want to show a badge in a few products, then write the product name in the search bar and select a product.
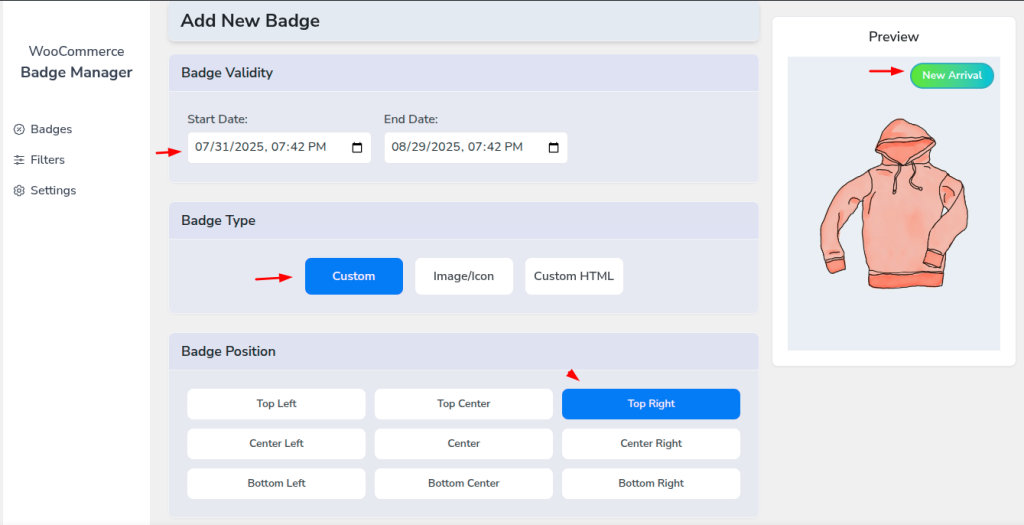
You can set a start and end date to display the badge for a specific period, leave both empty to show it immediately, or select a future date to schedule it.
Then select Badge Type custom for a custom badge. And now select a badge position by clicking on nine different positions.
After clicking the badge position, you’ll see the changes in the right side demo product.
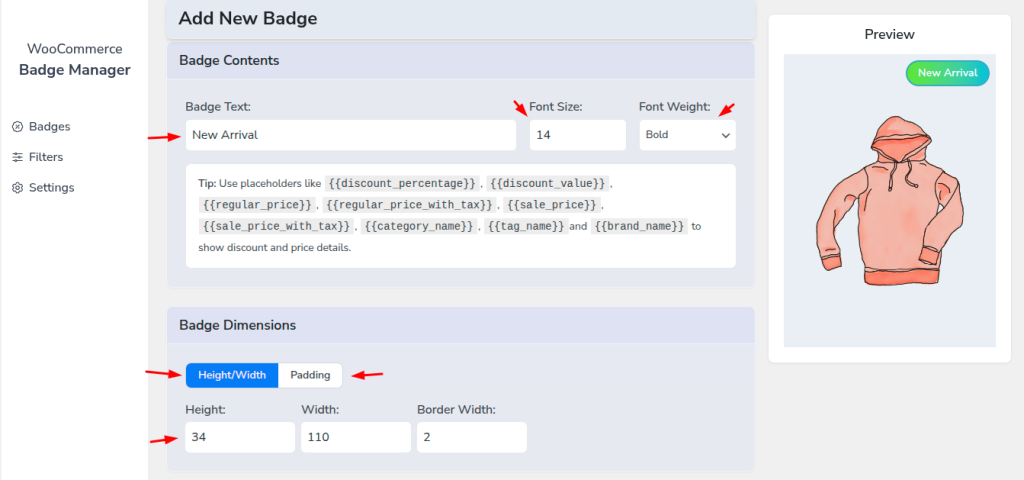
Then modify your badge content, set font size, and font style in the Badge Contents section, and set badge height, width, border width, and padding as you want.
Every change, you will see the right side demo product image.
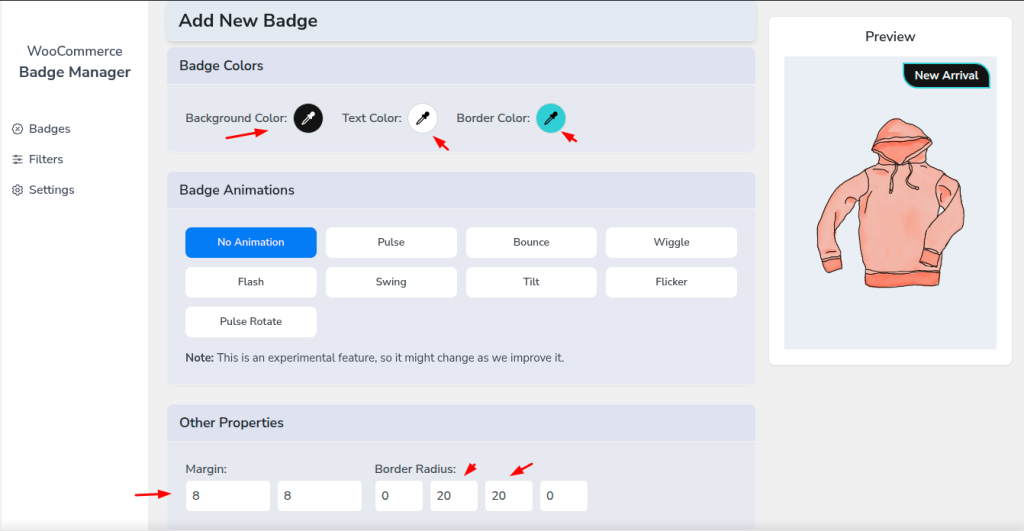
Now, change background color, text color, and border color from the Badge color section, and then you can select badge animation for a more eye-catching badge.
From other properties, you can also change the margin and border radius.
After all these, now you can save the badge by clicking “Save” button, and see it on your shop page view.
