
InnoCodia InnoCodia
Home
Plugins
Better Badge Dynamic product badges that lift conversions Store Manager (opens in a new tab) Advanced stock control for every product Better Recovery Soon Win back the carts your store loses
View all plugins
Blog Guides, tips and release notes Documentation Setup guides and developer reference Video Tutorials (opens in a new tab) Watch walkthroughs on YouTube
About Contact
My Account Get Better Badge Pro
Home
Better Badge Store Manager (opens in a new tab) Better RecoverySoon View all plugins
Blog Documentation Video Tutorials (opens in a new tab)
About Contact
My Account Get Better Badge Pro

Getting Started

1
  • How to install Better Badge Plugin?

Custom Badge

2
  • How to make custom animation badge by Better Badge plugin?
  • How to create custom badge by using Better Badge?

Image Badge

1
  • How to create image badge by using Better Badge?

HTML Badge

1
  • How to create Custom HTML badge by using Better Badge?

Filter

2
  • How to create dynamic low stock badge?
  • How to create filter in Better Badge?

Settings

1
  • How to hide WC sale badge and show custom badges?
View Categories
  • Home
  • Docs
  • Filter
  • How to create filter in Better Badge?

How to create filter in Better Badge?

< 1 min read

By using Better Badge, you can create an unlimited number of possible combination filters to apply badges. By using a filter, you can combine product properties like attribute, price or WooCommerce Tax, or shipping class.

How to create a basic filter #

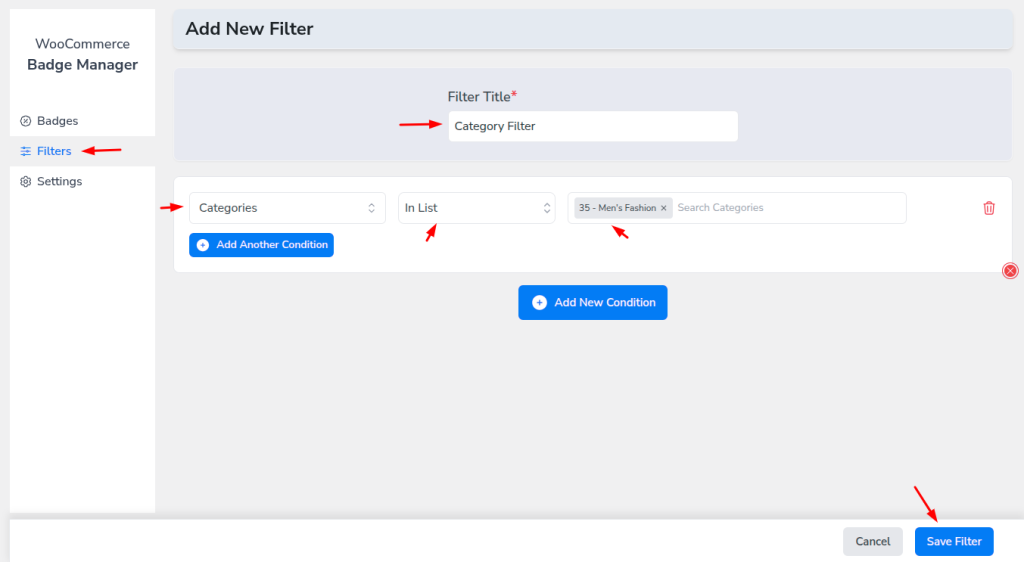
  1. Better Badge and click on the Filter tab.
  2. Then write a meaningful title for your filter.
  3. Then click on Add New Conditions
  4. Select any of the filters you want from the dropdown. Here we select category.
  5. Then select compare operator like equal, not equal.
  6. Ater that select the value, with wich you want to compare.
  7. Finally just save the filter.

How to apply the created filter on Badge? #

To apply filter in products follow the steps.

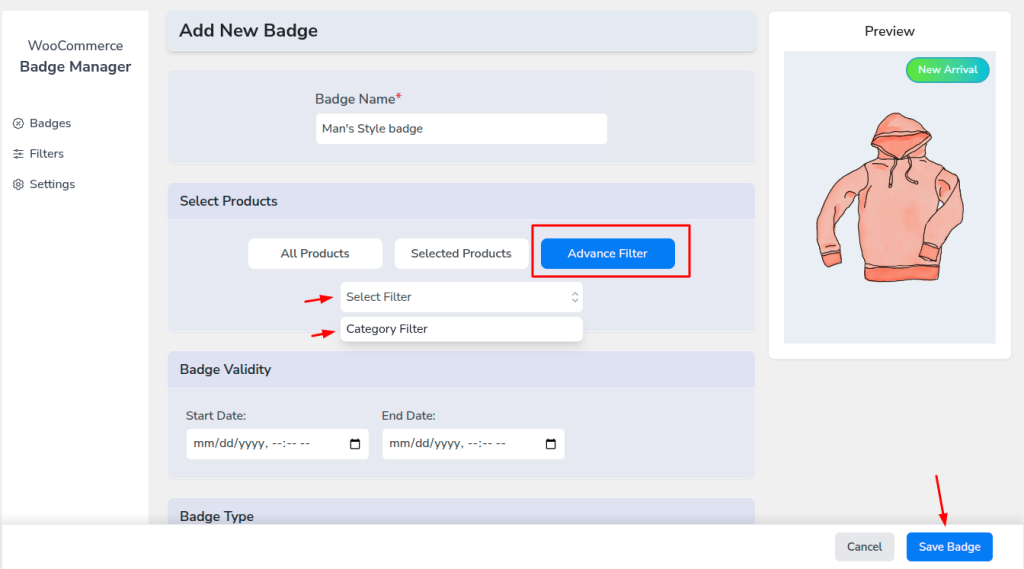
  1. Simply click on Create New Badge button and type your badge name.
  2. Then click Advnace Filter button for select created filter.
  3. After click Advance Filter, you’ll see all the created filter list like dropdown. Select a filter from dorpdown.
  4. Then simply design your badge, and save the badge.
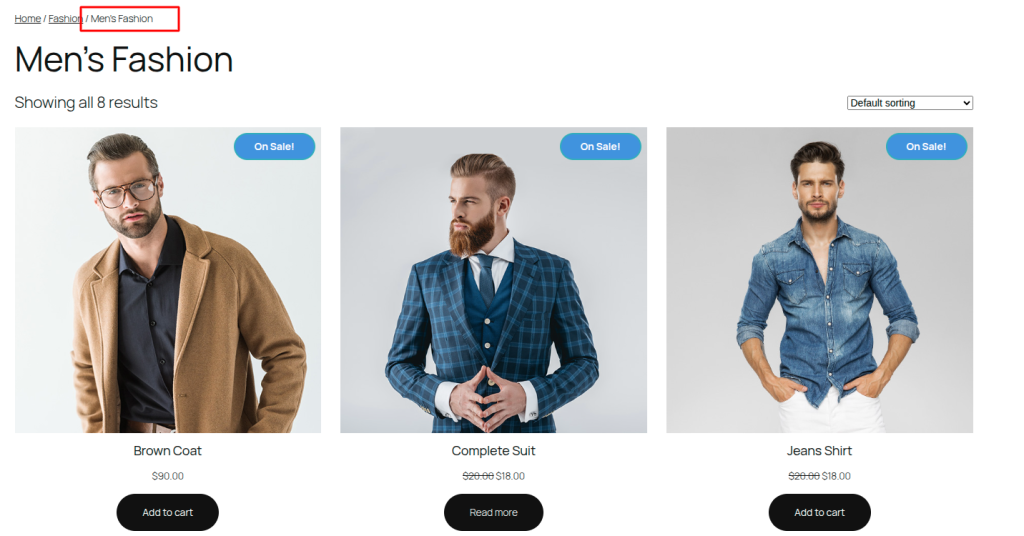
Now go to your shop and see the badge only visible on only selected filter products.
Updated on February 15, 2026

What are your Feelings

  • Happy
  • Normal
  • Sad

Share This Article :

  • Facebook
  • X
  • LinkedIn
  • Pinterest
How to create dynamic low stock badge?How to create dynamic low stock badge?

Leave a comment Cancel reply

Your email address will not be published. Required fields are marked *

Table of Contents
  • How to create a basic filter
  • How to apply the created filter on Badge?
InnoCodia

Building smarter, faster and more reliable WooCommerce plugins for modern e-commerce stores.

  • Facebook
  • Instagram
  • X
  • LinkedIn
  • YouTube
  • WordPress
  • GitHub

Plugins

  • Better Badge
  • Store Manager (opens in a new tab)
  • Better Recovery Soon
  • Pricing

Resources

  • Blog
  • Video Tutorials (opens in a new tab)
  • Documentation
  • Changelog

Company

  • About Us
  • Contact
  • Privacy Policy
  • Terms of Service
  • Refund Policy

© 2026 InnoCodia. All rights reserved.

WordPress® and WooCommerce® are registered trademarks of their respective owners.